
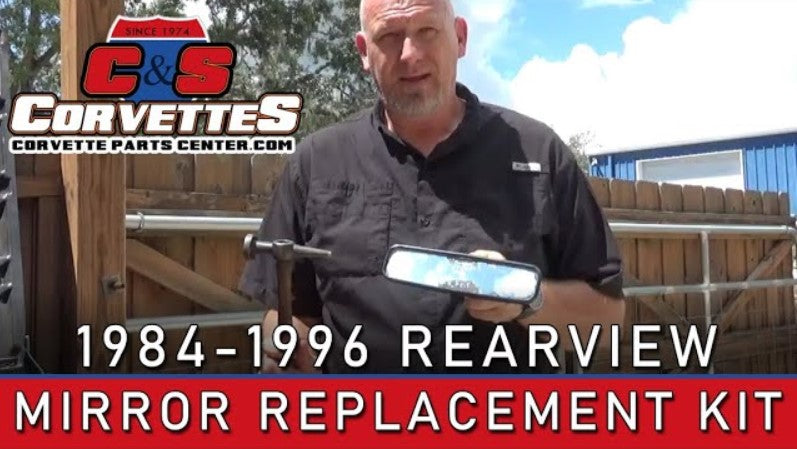

Corvette Rearview Mirror Replacement Kit, 1984 -1996
Video Transcript [Music] hello everybody welcome to c&s corvettes here in sarasota florida my name is lyle and i'm going to be teaching you how to install the mirror glass replacement kit for your 84 to 96 corvette rear view mirrors today so let's start with the obvious thing you can see here i got more than one mirror that's because they used count them four different kinds of mirrors between 84 and 96. i'm going to run through them very quickly and then i'll show you step by step on each one how to do this process first and foremost 84 85 and some of 86 you had just a plain rear view mirror okay no lights 84 85 early 86 that's first version second version is the what we call the single wire right single wire here one plug rear view mirror this was used middle-ish through 89. you can tell it's that vintage because it has one two map lights actually this one's missing a lens but you get the idea and this little slit this little slit right here that is actually the light that shines gently down upon your shifter console yes it exists yes it's a real thing you may not have even known that it was a real thing but it exists so that's number two number 2.5 also mid 86 through 1989 identical in every way single wire single plug same lights same everything however in their wisdom gm selected two manufacturers to make this so the way you're going to determine which one of these you have is you're going to take a tape measure like so okay we're going to set this down you're going to take a tape measure and you're going to measure the entire width of your rear view mirror you can do this in your car you don't have to take it apart you can do this in your car these mirrors are either going to be nine and a half inches wide overall or 9 and 5 8 inches overall that makes a difference because the size of the glass lens that we have to provide you with for that mirror is different depending on which one you have you'll notice when you go to buy this on our website that there's a little pull down window that asks you if it's nine and a half or nine and five eights wide that'll help keep everything that you need coming to you and not anything you don't need yeah that works okay finally 90 to 96 thankfully gm got their stuff together and they made a glorious two-wire mirror which in all respects looks identical to the mid-86 through the 89s but again was also different the good news is there were no changes to the size in this and only one manufacturer so this is really simple those are the things you're going to be dealing with when you go to the website let me show you what the kit consists of the basic kit which is the 84 85 and mid 86 with no lenses with no lights obviously has no light bulbs so you just get this custom custom-made lens shipped directly to your door and you will follow this video to do the job let's look at replacing this mirror lens in an 84 to a mid 86 mirror with no lights first thing you need to do is remove your old nasty glass lens it is a very precise and scientific process which i will now demonstrate for you outside by the dumpster i will now demonstrate proper used prism removal from the 84 to early 86 mirror pay attention this is very very difficult hammer [Music] done now that you have this taken apart and there's no more glass in here and you have not cut yourself and you're not bleeding what i want you to pay attention to is right here now this is going to be difficult to see i'm going to try to show it to you guys you'll see these little curved stands here and here and down here and down here if you look at them from the side and i really can't show you this on camera one is shallower than the other there's a reason for that the glass is thicker on one edge than it is on the other edge so thicker edge of the glass this is the top of your mirror here's the switch to dimmer switch at the bottom thicker edge of the glass goes in here now ladies and gentlemen obviously it's not going to be simple enough just to snap it in that would be far too easy what you have to do now is once you have the glass out of this unit you have to take a heat gun and wearing gloves so you don't burn yourself heat that plastic up uniformly till it gets a little bit more malleable a little bit more bendy then you're going to take the thicker end of the glass insert one corner into the top of the mirror get that started like so and then you i can't do it because this is cold right now but you're going to start working the edge of the mirror the edge of the mirror body over the prism all the way around and eventually this will just go curse snap and it'll be in place and you'll be done you just wipe it down and put it back in your car be careful to make sure that you heat this up properly because if you don't if it's still if it's really fighting you you haven't heated it up enough because if it's not heated up enough you're going to end up breaking this mirror glass and you're going to have to have me send you another one so to repeat remove break out old mirror glass heat plastic mirror body insert thick corner of top side of glass into top side of mirror body and then by pressing and bending around this will snap into place and once the mirror cools it'll never come out again that's the 84 to 86 and a half mirror simple now moving into the 86.5 and up with lights we already talked about the size differences between the two possibilities for the mid 86 through the 89 with lights you already have those measurements what i'm going to do now is i'm going to take one of these and i'm going to disassemble it in front of you so that you can see how this proceeds okay so first and foremost i've got two tools with me i have a very thin bladed flat screwdriver and a little bit thicker plated scrap flat screwdriver specifically because i'm gonna have to take this len this bezel that goes around the front of the mirror off to replace the glass inside which means i'm going to have to get started in these narrow cracks by shoving this in and twisting and picking it out and then as i get it started i can use the wider blade to get more bang for my buck going around and getting it loose okay in 86 mid 86 through 89 these bezels are actually glued in place there's several plastic tabs around this that i'm going to show you when i take it off where you have to kind of break the glue loose to remove this when that's done and after we go through the restoration process which you're going to see here in a minute when this goes back on you have to have super glue with you so that you can go ahead and put dabs of super glue back on those tabs so as you snap this back together it stays together permanently let's start with the basic disassembly on each side of the lights you will notice a small slit here and here okay put your small screwdriver in there and pry up and then you can lift and that comes out and then over here you do the exact same thing lift and that comes out so now you have all of your lights exposed now we have three light bulbs as i said two map lights and one shifter console illumination light what i do is i go ahead at this point and i unplug and remove old bulbs all three of them twist and remove we're going to say i removed that one and pull this one out set this aside just get it out of your way okay so now we've got access now we've got access to the underside of this bezel right here and we're going to start right about here on this corner and we're going to get our little screwdriver in there we're going to push it in gently and we're just going to twist it and it's going to lift just a little bit then we're going to move it a little move it about a quarter inch a half inch twist it again do it again keep moving every half inch turn and twist as long as it's going easily you don't even have to switch to your thicker screwdriver so i'm going to continue around here keep going now obviously guys i've done this one already once so this is coming up super easy you are going to have especially with the 86 to 89s where they're glued in place you're going to get to points where you are going to need the thicker wider screwdriver to give you enough torque to pop that glue loose but you're going to be using the same exact motion that i'm using here same exact thing so around going around going around all the way around and now oh the toughest part of this the toughest part of this mirror is there is this one section here between the two holes where your lights live that seems to be the most aggressive glue gm ever made ever because this is where you really have to be careful not to break your bezel so starting again with the small blade you want to go through and very carefully start it you're not listening to me get it started there now you're listening thank you and once it gets started then you can pop this off let me work on this for a second and pop this off and i'll be right back to you all right now i've gotten finally this bezel off so i can show you the detail that i really wanted to see now look down here so this has it's kind of hard to see let me see if i can get a little background here to show you this has what basically look like little teeth all the way around it okay those are your glue points that you're going to deal with so these guys down here are the ones that stick the most between the lights the bottom but we got this oscar set off successfully we didn't break it now moving on we're back to ready to put the glass in place just like with the 84 and 85 without the lights there's a thicker and a thinner edge to this glass on these guys that is the thicker edge at the top again so we're going to set this glass in like that we're then going to take our bezel and we're going to replace it right the way we took it off and using basically the same exact method we're going to start it we're going to get it started all the way around which is what i'm working on now come on work with me there we go okay so we've got it basically started now what i'm going to do is in the same corner that i started prying it up on i would have put glue on inside this case little dabs of glue everywhere one of those teeth was coming down i'm going to start pressing every corner and follow my thumb all the way around you'll hear small cracking clipping sounds all the way around all the way around till you get to the front now before i go further if i'm gluing this i am then going to turn it over press on it like this and leave it on my workbench probably for at least a couple hours if you do it at night don't touch it again until the morning just because we want to make sure that is solidly in place and that bezel can't come out because if the bezel comes out your glass is coming out we don't want that to happen so beautiful morning here we are now we're going to go ahead and put this all back together so we're going to take with these mirror kits the 86 through 89 and the 9296 you get three light bulbs as i said we are going to replace the old light bulbs that we already removed so that one goes in and we're going to pull this plug out and we're going to put a fresh they're spades they just slide right in they can only go one way you cannot screw this up it is not possible it is not probable okay so that's back in once you get to that point okay this has a little lip on it that goes down and under right here and then we press this into place that is now fully reinstalled same thing here we're going to put a new bulb in angled goes in under the middle and then we press the other side down into place our mirror is now beautifully reassembled with a fantastic new lens in it and you shouldn't have to do this again in the life of your car for the 90 to 96 mirrors for the 90 to 96 mirrors there's really no change the only difference is this bezel is not glued in place on these so these are usually a lot easier to pop out and you're going to do the same thing pop the lights get the bulbs out of the way throw them away so you don't confuse your old bulbs with your new bulbs then you're going to take your screwdriver starting at the corner and start going all the way around the edge and this will pop pop pop pop much easier because these are snap ins not glue ends let's go ahead and do that because there's one little thing in here i want to talk to you about that could be important if you're not familiar with these things okay so let me get this out of the way let me get this out of the way okay lost a bulb there but we'll get that in a minute okay i'll be right back i'm going to go ahead and get this loose you go now that i've got this bezel off i'm actually going to take the mirror out with it to show you something so this is coming off the unit now i want you to look at the back of this mirror you can tell this is an original gm mirror because it has kind of this yellowish glue stuff back here pay attention in particular you see this little yellow cushion and this little yellow cushion those need to be peeled off of the old glass and they just come right off and they need to be replaced in your mirror there's a little post here and a little post here that they go on so before we do anything else let's go ahead and do that put those back where they belong that's the way that should look two little cushions there another thing you're going to notice is that on the back of the mirrors this piece of black plastic that also just peels off and you'll see there's an arrow on it here's the key when you do this make sure you see which way the arrow is pointing when you take it off so you don't forget how to put it back on because this unit then the ribbed side snaps in above these wires and forms the base of where your mirror is going to go like so so there you go actually the mirror on this one is pointing downward so wherever however it came off of the glass is how it goes back on the mirror that's easy now you're going to go ahead and you're going to put your new glass back in here let's pretend this is new glass okay and you're going to put your bezel back on over that glass just like i've shown you okay snap everything back in place all the way around everything's happy new bulbs new bulbs then we got the lamp here with the little angle that stop it that put that ball back in because it's in my way that ducks in under the middle and then you press down to secure it both lamps and it's ready to go back into your car guys that's all there is to it this is not rocket surgery you just have to be careful and thoughtful and methodical when you do the job now i get a lot of questions from people who buy these kits especially the ones that have wires on them like this okay how do i get to these plugs okay if you have to ask that question a you probably shouldn't be doing the job but i'm going to go ahead and answer it anyway just to help you out so one phillips screw holds this holds this to your windshield then this wire goes up under that black plastic reveal molding these plugs are hidden behind that the only way to access them is there's several phillips screws between your sun visors on that black plastic that you can loosen and once you loosen those if you pull on these wires gently you'll see these plugs come out then you can unplug them and go to work on your bench so in a nutshell guys this is how you restore your 84 to 96 interior rear view mirror for your corvette 84 85 and early 86 no light kit is 19 shipped to your door the midis 86 through 96 kits with the light bulbs and the glass are 29 shipped to your door give me a call if you have any questions you'll see these on my website at corvettepartscenter.com under the c4 group heading i am here for you my name is lyle and thank you for watching [Music] you